
Blog

What is a Lint Trap? A lint trap catches the fuzz and small pieces of fabric that come off your clothes when you wash them. It helps keep these bits from clogging your washer or pipes. This makes sure your clothes get clean and your washer stays in good shape.
Top Load Washer Lint Trap: In top load washers, the lint trap is usually under the lid or at the top of the wash tub. You might see it as a small net or filter. It’s where the water pours in or near the agitator. In these washers, you lift the lid to find and clean the trap.
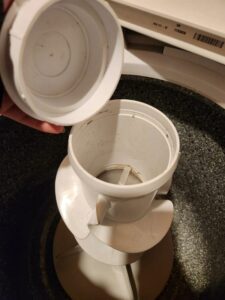
Front Load Washer Lint Trap: Front load washers often have the lint trap near the front, at the bottom of the washer. You might have to open a small door or panel to get to it. It’s usually a small, removable filter that you can pull out to clean.
Each washer model is a bit different, so it’s good to check your manual to find your lint trap’s exact location and how to clean it. Regular cleaning, no matter the type of washer, helps keep your clothes and machine clean.
Risks of Not Cleaning: Not keeping the lint trap clean can lead to problems. It can make the washer less efficient, using more water and energy. This means higher bills for you. Also, the extra strain can cause parts to wear out faster, leading to costly repairs or the need for a new washer sooner. Worst of all, it can cause clogs or damage that might lead to water leaks or other serious issues in your home. Regular cleaning is a simple step that keeps everything running smoothly and safely.
Tools and Materials Needed:
Safety Precautions:
Step 1: Locate the Lint Trap
Step 2: Safely Remove or Open the Lint Trap
Step 3: Carefully Remove Lint and Debris
Step 4: Wash and Rinse the Lint Trap (if applicable)
Step 5: Dry and Reattach the Lint Trap
Cleaning your lint trap is a simple but essential maintenance task. Regular care keeps your washer efficient and prolongs its life, saving you time and money in the long run.
Deep cleaning helps to maintain the efficiency and longevity of your washer. It’s a bit more effort, but it’s worth it to keep your machine running well and your clothes coming out clean and fresh.
Problem: Sometimes, lint and debris can become tightly packed or stuck in the lint trap.
Solution: Gently use a brush or a toothpick to loosen and remove the debris. If it’s very stubborn, a small pair of tweezers might help. Always be gentle to avoid damaging the trap.
Problem: Some lint traps might be hard to reach or open, especially in older or less common washer models.
Solution: Refer to the user manual for specific instructions on accessing your lint trap. If the manual isn’t available, look up your model online for guidance. Ensure the machine is turned off and unplugged before attempting to access difficult areas.
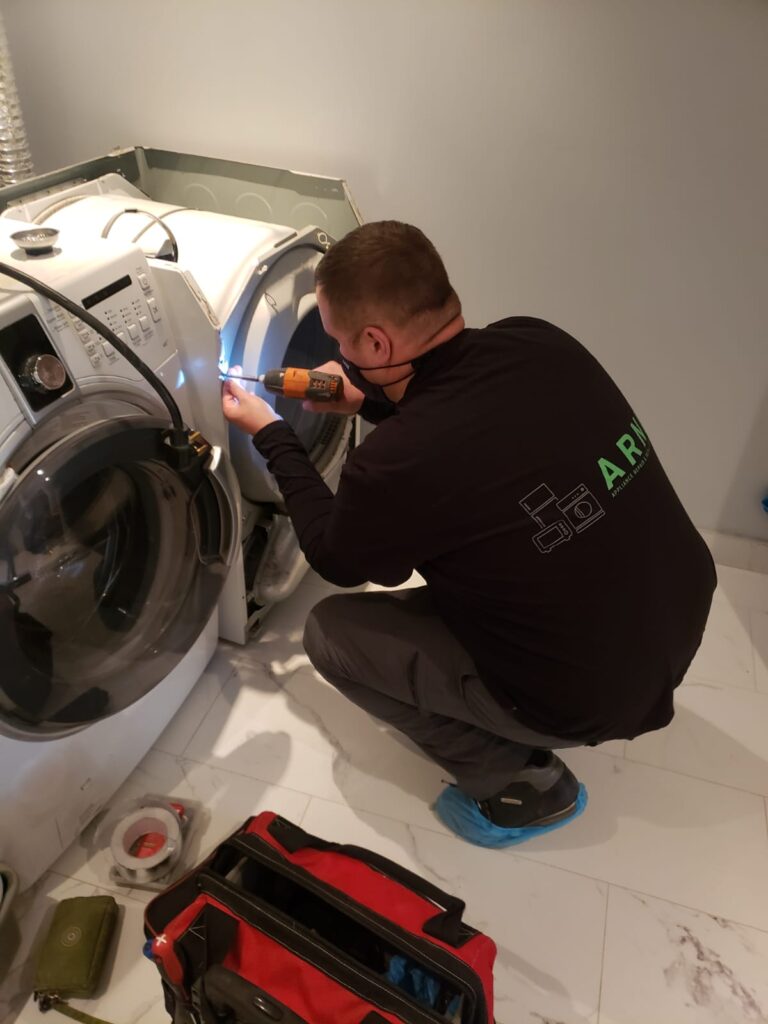
If you’re unable to clean the lint trap thoroughly due to its design or if you notice your washer still isn’t performing well after cleaning, it might be time to call in a professional. This is especially true if:
Professionals can provide a more thorough inspection and cleaning, and if necessary, repair any damage that might be causing issues. Regular maintenance can often prevent these problems, but when in doubt, professional advice can save time and ensure safety.
By following these preventive measures and best practices, you can significantly reduce the risk of lint-related issues in your washer, ensuring it runs smoothly and effectively for as long as possible. Regular care not only improves performance but also saves you money on repairs and replacements

It’s best to clean the lint trap after every few washes or whenever you notice it starting to fill up. Regular cleaning prevents build-up and maintains the efficiency of your washer.
Mild soap and water are usually enough for cleaning lint traps. Avoid harsh chemicals that could damage the trap or leave residues. For a deeper clean, consider using vinegar or specialized washing machine cleaners.
If the lint trap is damaged, it might not catch lint effectively and could even harm your washer. Replace damaged lint traps immediately. Consult your washer’s manual or a professional for the correct part and installation advice.
The location of the lint trap varies by model and make of the washer. Generally, top load washers have the trap under the lid or near the top of the drum, while front load washers typically have it at the bottom front. Consult your washer’s manual or manufacturer’s website for specific information.
Yes, if lint traps are not cleaned regularly, they can accumulate damp lint and debris, leading to mold and mildew growth, which causes unpleasant odors. Regular cleaning prevents these odors.
If you have concerns about your appliance’s performance, contact the professionals at ARNI Services, Appliance Repair, for a thorough diagnosis and repair service. – you can’t put a price tag on peace of mind.